Simple Chocolate Truffles (Gluten-free, dairy-free)
I wanted to make a fancy little dessert for some company we were having. I combined a few different recipes I have seen before and made these delightful little treats! They are amazing! And with only 4 ingredients, they are easy to make. Overall, I feel like they really aren’t too bad for you. At least that is how I am justifying eating way more of them than I should! Yum!
Simple Chocolate Truffles
Truffle Filling:
1/2 c. pure maple syrup
1/4 c. coconut oil
2/3 c. cacao
Truffle Coating:
1 c. dark chocolate or bitter sweet chocolate chips, divided
1 Tbsp. coconut oil, divided
In a blender or mini-food processor, combine truffle filling ingredients (maple syrup, coconut oil, cacao). Refrigerate until firm. Once cold, scoop out filling into ball shapes. (I used a melon baller for this step making it really simple). Place balls on a sheet of parchment and put in the freezer for 30-60 minutes. If your balls are a little droopy, you can easily reshape them once they are frozen.
Just before you take the balls out of the freezer, melt half of the chocolate chips and coconut oil together. This can be done in a double boiler or in a microwave on a low heat setting. Be careful not to overheat the chocolate.
Remove the filling from the freezer and dip each ball in the melted chocolate and put back on the parchment paper. Once you have used up the first half, melt the second half of the chocolate chips and coconut oil. This just helps to make sure it doesn’t cool down too much before you use it up. Dip remaining truffles in chocolate.
Freeze again until outer shell is hard. Truffles can be kept in the refrigerator until you serve them. I don’t know how long they will last in your fridge because ours only lasted a couple of days. 🙂 Enjoy!!
Christmas Cookie Round-Up
This year we made some great Christmas cookies and while most of the recipes were from other bloggers, I wanted to keep track of what we made and the minor changes I did to some of the recipes so we can use them again next year. So, here are the links to what we made and how we made them our own!
*Two notes… First, while I am generally dairy-free as well as gluten and corn free, I have found that I can tolerate some butter so many of the recipes do include it. Second, in any recipe that calls for an all-purpose gluten free flour, I used the Namaste mix that you can find at Costco. It worked great and I was even able to sub it one-for-one for regular all-purpose flour in my family’s traditional Belgium cookies.
1. Gingerbread Men and Royal Icing
I love gingerbread cookies and I love to do cut-outs with the boys each year. The cookie recipe was fairly simple and the only change I made was leaving out the xanthan gum (my flour mix had it in it already) and using arrowroot powder in lieu of cornstarch.
http://glutenfreeonashoestring.com/gluten-free-gingerbread-men-cookies/
For the Royal Icing, I needed a recipe that didn’t use confectioner’s sugar as that is made of white sugar and corn starch. Seriously, corn is in everything! 😦 This recipe uses regular granulated sugar. While mine didn’t stiffen up as well as the recipe indicated, it got thick enough for the boys to pipe it out onto the cookies.
http://heavenlycakepops.com/2014/02/royal-icing-granulated-sugar/
I think for next year with these two recipes, I would like to work on finding a way to make these without refined sugar at all but for this year, we let go a little and just enjoyed them!
2. Peanut Butter Balls
Oh goodness were these delicious!!! And, truly, they really aren’t too unhealthy for you with just simple ingredients: dates, peanut butter, oatmeal, coconut oil, dark chocolate. The only change I made to this recipe was that I used an unsalted peanut butter so I added a pinch of sea salt to the mix. Oh, and we made a double batch of these because they were just so good. These may become a year-round treat at our house instead of just at Christmas treat! 🙂
http://www.eatingbirdfood.com/2014/12/healthier-peanut-butter-balls/
3. Butter Crunch Toffee
One of my all time favorite Christmas treats that my dad always made when we were younger is Butter Crunch Toffee. I love it! But, unfortunately it has corn syrup as one of the ingredients. Boo! So, I came across the following recipe that was quite similar to my family’s original. When my dad and I made it this year, he and I agreed that it turned out even better than the original recipe! And, I love that it uses maple syrup and no refined sugars! How awesome is that.
The main changes we made to the recipe were using chopped walnuts instead of almonds, and using unsweetened chocolate on both the top and the bottom of the toffee rather than semi-sweet chocolate on one side. The other thing that we did was use a candy thermometer, getting the toffee to a hard crack before adding the nuts.
This toffee was so good that we ate it all up well before Christmas even happened and needed to make a second batch. Yum!!!!
http://www.thenourishinggourmet.com/2013/12/almond-roca-with-maple-syrup-graincorn-syrup-free.html
4. Belgium Cookies
When I first started cutting out gluten, one of the foods I most mourned not being able to eat were our family’s traditional Belgium Cookies. While it is a family recipe and I am not going to publish it here, I just wanted to make note that by using Namaste flour mix one-to-one in the original recipe worked great. They are such a treat!!! I LOVED that this recipe turned out and tasted so close to the original that even my dad, the Belgium Cookie maker of the family thought they were a close match. Yay!
Chili
So, I feel like a recipe for Chili is something some people hold sacred, as in this is “THEIR” chili recipe, often with secret ingredients or their own special twists. I can say that I have been working and reworking “MY” chili recipe for quite some time, constantly tweaking the various spices and ingredients. Tonight, I think we finally hit on the combination that is just right. It was spicy without too much heat. It was meaty with some beans, had a few veggies in it without being overly heavy on vegetables. Even my 5 year old ate an entire bowl. Victory!!!
So, here is MY chili recipe. The seasoning is easy to mix up ahead of time and store in the cupboard until you need it. I have done it in a double batch before and used half and kept half for another time. Makes that second time of making chili a little quicker.
*If you like a lot of heat in your chili, add 1/2 tsp. cayenne pepper to this recipe. We omit it because it otherwise becomes too spicy for the kids.
Chili
1 green pepper, diced
1 yellow onion, diced
2 stalks celery, diced
1 1/2 lbs. ground beef
2 small (6 oz.) cans tomato paste
1 can diced tomatoes
3 c. chicken broth
1 can kidney beans
1/2 oz. unsweetened chocolate
Chili Seasoning
2 Tbsp. chili powder
2 1/2 tsp. cumin
3 tsp. onion powder
2 tsp. Hungarian paprika
1 heaping tsp. garlic powder
1 tsp. salt
1/2 tsp. oregano
1/2 tsp. mustard
1/4 tsp. coriander
1/8 tsp. black pepper
1 bay leaf
Instructions:
In a large skillet, saute pepper, onion, and celery until tender and slightly browned. Add ground beef and continue to cook until beef is no longer pink.
Add remaining ingredients and bring to a boil. Once boiling, reduce heat to low and simmer for 20-30 minutes or until slightly thickened. The longer you simmer, the more the flavors merge and the better it gets. In fact, I prefer my chili a day old as the leftovers are always better than the first day.
Once thickened, serve hot. My family likes it with some crackers and cheese on top. I like mine just plain. Enjoy!
Husband Rating: 9 out of 10
Easy Gluten Free Dairy Free Zucchini Muffins and Bread
I love making zucchini bread and muffins around this time of year. There is so much fresh zucchini available at the farmers markets! This recipe is quick to put together and tastes great. The whole family liked it! I adapted the original recipe (linked here) by cutting some honey, adding some chocolate and making muffins instead of a loaf of bread but making it either way works well! Enjoy!
Easy GF/DF Zucchini Muffins (or Bread)
Makes 12 muffins or 1 loaf of bread
2 c. Almond flour
1/2 tsp. sea salt
1/2 tsp. baking soda
1 tsp. cinnamon
1/4 tsp. ground nutmeg
1/4 tsp. ground ginger
1/4 c. Coconut oil, melted
1/3 c. Honey (or maple syrup would work)
2 large eggs
1 1/2 c. Shredded zucchini, lightly packed
1/3 c. Chocolate chips (I use Enjoy Life brand)
Preheat oven to 350 degrees.
Line muffin tin with papers. Or if making bread, line a loaf pan with parchment paper or grease well with coconut oil.
Combine dry ingredients in a large bowl. Add the wet ingredients and stir to combine. Don’t over mix.
Pour batter into prepared dish. Bake muffins for 22-25 minutes or bread for 50-60 minutes or until a toothpick inserted in it comes out clean.
Cool in pan for 10 minutes before moving to a cooling rack. Store in an airtight container. Enjoy!!
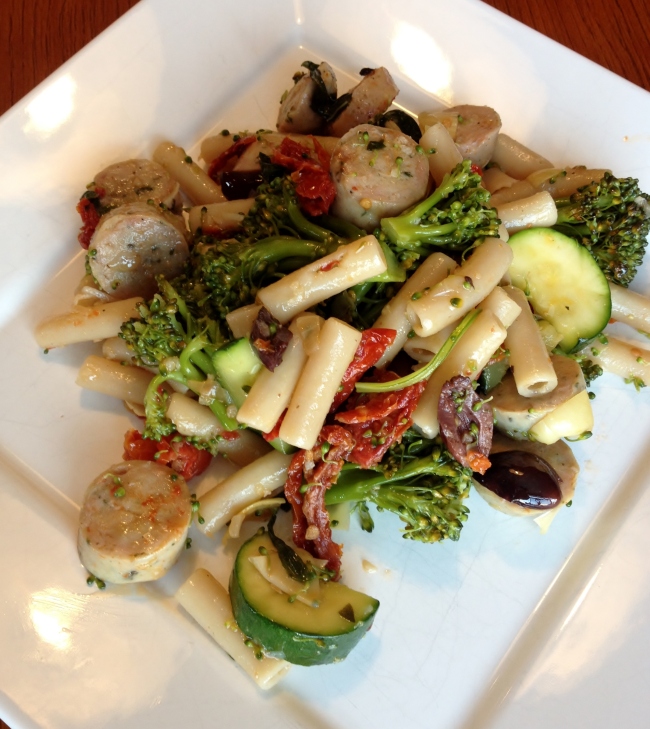
Fresh Veggie Penne Saute
This is one of my current favorite meals! I am not one to repeat meals very often as I love variety but this one we have made half a dozen times in the last few months! It’s easy, fresh, healthy, and there is something in it that everyone in the house likes. One of my boys likes the sausage, another the penne, and I love the veggies! With all the farmer’s markets and gardens growing, this meal will be even tastier with those fresh picked vegetables.
One thing we have discovered about this meal is that it is delicious as cold leftovers. So, it makes me think that it could also be a great cold salad for a potluck or picnic. I would think that you could do the veggies either cooked or raw in that case and maybe would leave the meat out. Just a thought. I will let you know if we do it that way.
Fresh Veggie Penne Saute
Recipe adapted from The Nourishing Home
Ingredients
1 lb. Sweet Italian Chicken Sausage (I got mine from Trader Joe’s)
12 oz. gluten-free penne (I use the brown rice penne from Trader Joe’s)
1 bunch broccoli, cut into florets
2 medium zucchini, sliced
1/2 c. yellow onion diced
6-7 cloves garlic, minced
1/4 c. olive oil
1/4 c. sun-dried tomatoes packed in oil, reserve 1-2 Tbsp. oil from tomatoes
1/2 c. artichoke hearts, chopped
1/2 c. fresh basil, roughly chopped
1/3 c. kalamata olives, halved
salt/pepper to taste
In a medium pot, bring water to a boil. Cook penne until al dente. Drain and rinse and set aside.
*To make my clean-up easier, I use the same pot for cooking the noodles as is the bottom to my steamer. I make the pasta first; then refill with fresh water and steam the broccoli on top.
Chop all veggies and slice the sausage. Steam broccoli until just tender.
In a large pan, cook sausages until hot through and set aside. Add 2 Tbsp. of olive oil to the pan and saute the onion and garlic until the onion is tender. Add the zucchini and continue to saute until zucchini is just tender. Add remaining ingredients, including the cooked sausage, noodles, and broccoli and toss together. If the dish needs a bit more flavor, add a bit more of the reserved oil from the sun-dried tomatoes. Season with salt and pepper to taste. Serve warm or cold!
Husband Rating: 7 out of 10
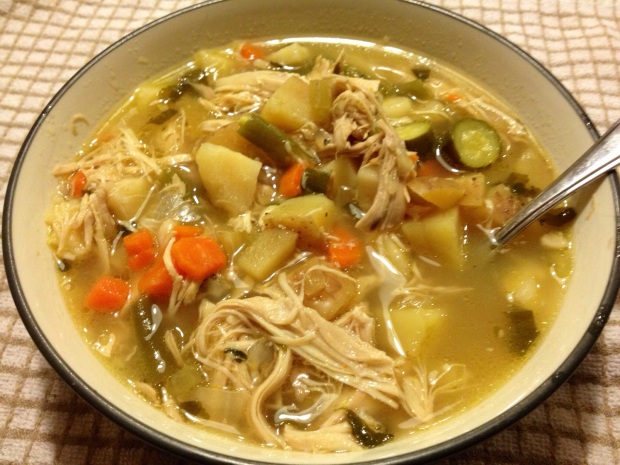
Once Around the Kitchen Soup
All this snow and cold weather has me craving soups. On top of it, my little 3 year old has croup and a fever which always inspires me to make a good healthy soup.
Since soup was not originally on my menu plan for the week, I tossed together a bunch of random things to make it, hence using the phrase “Once Around the Kitchen” in the name. I ended up tossing in a bunch of veggies that I had in the fridge. I was feeling doubtful about how this soup would turn out because it seemed like such a random collection of good from around the kitchen but my husband agreed that it was one of the better soups I have made lately. So, as we ate, I grabbed a notebook and jotted down all I remember adding in. Hopefully, I got it all. And if not, no big deal – this is the kind of soup that you can just grab whatever veggies you have on hand, chop them up and toss them in making your own “Once Around the Kitchen Soup”.
Once Around the Kitchen Soup
Cooked meat of one chicken, shredded*
1 Tbsp. grapeseed oil
5 cloves garlic, minced
1 small yellow onion, chopped
2 carrots, chopped
1 stalk celery, chopped
6 c. chicken broth (preferably homemade)
2 parsnips, sliced
4-5 small red potatoes, cubed
1 c. sliced zucchini (I had mini ones on hand, perfect size for soup)
1/2 c. green beans, cut into 1 in. pieces
1/4 c. chopped parsley
2 bay leaves
salt/pepper to taste
*Cook the chicken however you prefer. I cooked a whole chicken as a starter for a new batch of chicken broth. Instructions for how I do that follow the recipe.
Instructions:
In a large pot, heat oil over medium heat. Add garlic, carrots, onion, and celery. Saute until tender, about 5 minutes. Add remaining ingredients (except parsley) and bring to a boil. Reduce heat and simmer for at least 30 minutes or until potatoes are tender. I simmered mine for about 3 hours because I started it during nap time. About 15 minutes before you serve it, add parsley and taste to see if it needs more pepper/salt. Serve hot. Pretty easy! My kind of meal!
Chicken Bone Broth Instructions
In a large stock pot, place whole chicken, one onion (roughly chopped), 2 carrots (roughly chopped), 1 stalk celery (roughly chopped), 1-2 Tbsp. apple cider vinegar (I use Braggs), and water to cover all. Turn heat to medium and bring to a simmer.
During the first 30-45 minutes, watch the pot to skim off any scum that floats to the top. Keep heat at a medium to medium low so that it just barely simmers.
After 1 1/2 hours, check the chicken to see if it is cooked through. Once the chicken is cooked through, remove it from the water and turn off the heat. Pull the meat off the chicken putting the meat into a bowl and putting the bones and skin back into the cooking water. Set meat aside for whatever you want to use it for.
After the chicken is cleaned and carcass is back in the water, pour the entire contents of the pot into a crock pot. Set to high and allow to cook for 8-24 hours. I usually alternate between high and low on my crock pot because it seems like the high simmers too high and the low isn’t hot enough to get a good simmer going. Over night I usually leave it at low though.
About 15 minutes before you are ready to finish your broth, add 1 bunch parsley roughly chopped. This step isn’t necessary but I have read that the parsley helps to draw out additional minerals so can be very good for you.
When you are done simmering, strain the broth through a fine mesh sieve. Be sure to press down a little on those veggies to squish out any liquids remaining. Allow broth to cool. A good broth will become gelatinous when cooled. Mine doesn’t always. I haven’t figured out why yet… To store it, I put mine in 2 cup increments in quart sized freezer bags. I then lay them flat in the freezer to freeze. It makes for easy use later on. If you don’t want to freeze it, it can be in the fridge for about a week.
Best broth you can have! I love it and even try to drink it plain once or twice a week for all it’s good health benefits. Enjoy!
Gluten-Free, Dairy-Free Chicken Pot Pie
It has been almost a month now of having added in dairy-free and corn-free to my diet status. I still have those moments of mourning for food I used to eat… like when my family has pizza, or when we go to a restaurant and there are only like 1 or 2 items on the menu I can order. It really makes me sad because I loved eating out and being able to try adventurous foods that way. But, I am hoping that with time I can either:
A) add some dairy back into my diet occasionally thus giving me a few more options when we eat out, or
B) become more confident in my ability to order food at restaurants that won’t make me sick.
In general though, this who restricted diet thing seems to be getting easier. I have more ideas now of what we can eat at home and of some simple substitutes or omissions to make in meals to make them gluten-free, dairy-free, and corn-free.
As far as any significant change in my health since doing this, I haven’t really noticed any. I am wondering though how I might feel once I try some dairy again and if then I will realize what “symptoms” of my intolerance that have gone away. I have about a month and a half to go until I try.
For dinner tonight, we had a delicious chicken pot pie. It is the second time I have made this recipe and I am really pleased with how it turned out! It is the perfect meal on a day like today when temperatures never get above -6 degrees. I found the recipe on a paleo food blog and adapted it a bit for our tastes. Hope you like it like we did!
By the way, my photos were terrible of this so I will have to add one later.
Gluten-Free, Dairy-Free Chicken Pot Pie
Recipe adapted from http://mrspaleo.blogspot.com/2012/05/chicken-pot-pie-sequel.html
The Filling:
3 slices bacon, diced
1 onion, diced
3 carrots, sliced
1 celery stalk, diced
3-4 cloves garlic, minced
1/2 c. green beans
1 medium sweet potato, diced
1 1/2 c. chicken stock
1 14 oz. can full-fat coconut milk
3 Tbsp. arrowroot powder
1 Tbsp. poultry seasoning
1 tsp. sea salt
1/2 tsp. black pepper
2 large chicken breasts, cooked and diced
The Crust:
1 c. tapioca flour
1/4 c. coconut flour
1/4 tsp. baking soda
1/2 tsp. cream of tarter
3 Tbsp. coconut oil or organic coconut spread (butter alternative)
1/2 tsp. sea salt
1/2 c. boiling water
In a large pot, fry bacon until crisp. Add in carrots, onion, garlic, and celery and saute until tender, about 5 minutes.
Add chicken stock, coconut milk, poultry seasoning, salt, pepper, beans, and sweet potato. Bring to a boil. Reduce to a simmer and whisk in arrowroot powder 1 Tbsp. at a time. Continue simmering until thickened.
Remove from heat, stir chicken in and pour into a 2-qt. casserole dish. Set aside.
In a small bowl, combine dry crust ingredients. Cut the coconut oil in to the dry ingredients. When fully cut in, the oil and flours should mix together in pea sized chunks. Add in hot water and mix together into a ball.
Place dough ball on a sheet of parchment paper. Top with another sheet of parchment paper and roll out to approximate size of baking dish.
Using the bottom sheet of parchment paper, lift crust onto top of filling. Peel parchment paper away.
If cooking immediately, place in a preheated 400 degree oven and bake for about 10 minutes uncovered If you are like me and make it during nap time and bake later, place in a 400 degree oven and bake for 20-30 minutes. Keep covered until it starts to get hot in the middle and then remove cover to allow crust to brown up.
Serve immediately.
Husband Rating 8 out of 10
Food for Thought: This is easy to adapt in that you can really add any different vegetables you have. I like to add red potatoes, or maybe peas. Just keep it somewhat similar in proportion to make sure there is enough sauce.
Pumpkin Waffles
After tasting his first bite of “brinner” tonight my four year old said, “Mom, this is the best dinner ever! You should post this on your blog.” I didn’t know that he knew I wrote a blog and I am not even sure he knows what a blog is. Regardless, any meal my boys regard as blog worthy is truly blog worthy.
I have found a fun new blog that has great clean gluten-free/grain-free recipes, http://www.eatthecookie.wordpress.com. I slightly adapted her recipe for Sweet Potato Waffles and made what the boys and I would agree are the best gluten-free waffles we have had to date.
I served it with some breakfast sausage (Applegate makes a great gluten-free chicken breakfast sausage that tastes like regular sausage) and a green smoothie, which I have been making quite often for my own breakfasts. Recipe for that to come soon, too.
We served the waffles topped with organic cream cheese and a small drizzle of pure maple syrup. Yum!!! Delicious!!
Pumpkin Waffles
1 c. pumpkin puree (I used organic pumpkin from Trader Joe’s)
4 eggs
1/4 c. unsweetened almond milk (or more if batter is too thick)
2 Tbsp. coconut oil, melted
2 tsp. vanilla
6 Tbsp. coconut flour
1/2 c. tapioca flour
1/4 c. flax meal
1/2 tsp. salt
1 tsp. baking soda
1 tsp. cinnamon
1/4 tsp. each cloves, ginger, and nutmeg
In a medium bowl, combine pumpkin, eggs, coconut oil, and vanilla. Mix well. In a seperate bowl, combine dry ingredients. Mix two bowls together and add almond milk.
Allow to sit for 5 minutes. If batter is too thick, add more almond milk, a Tbsp. at a time until desired consistency. The thicker the batter, the more dense your waffles will be. I kept my batter pretty thick and had nice, dense waffles.
Heat waffle iron to a medium heat. Pour batter in and cook until done. This batch made two whole waffles for me.
Top with organic cream cheese and a dash of syrup for an amazing taste! Enjoy!
Husband Rating: Didn’t get one because my husband wasn’t home for this dinner but I think the fact that my 4 year old loved it so much speaks for itself… he rarely loves anything these days! Ahhh, the joys of parenting! 🙂
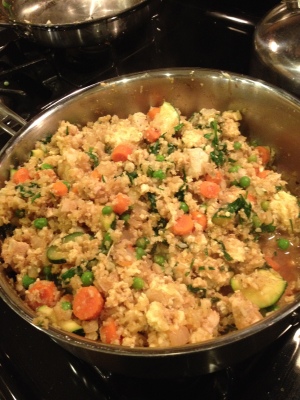
Cauli-Fried Rice
After the successful Spanish “Rice” recipe using cauliflower, I decided to tackle using cauliflower as rice again. This time I did a fried rice. I have made it a few times but tonight finally hit on the combination we really like!
I have to say, for the skeptics out there, I didn’t tell my husband that I was using cauliflower in lieu of rice. When he took his first bite, he said it was the best fried rice I have ever made. After I told him it wasn’t actually rice, he said that he didn’t see why we would ever do actual rice again. It was that good!
So, needless to say, don’t be afraid to try it like I was. You really should try making cauli-rice. (BTW, Terrible picture… I know… sorry! But, really, this is a delicious meal you need to try!!!)
Cauli-Fried Rice
Recipe adapted from http://www.lexiscleankitchen.com
2 chicken breasts, cut into cubes
1 zucchini, halved and sliced
1 c. spinach
5 carrots, sliced
1/2 c. peas
1 yellow onion, diced
4 cloves garlic, minced and divided
1 head cauliflower
3 eggs
4 Tbsp. soy sauce
salt/pepper to taste
1/4 c. chives
1/4 tsp. red pepper flakes
1 tsp. onion powder
1 tsp. garlic powder
2 Tbsp. grapeseed oil or coconut oil, divided
Place cauliflower in food processor and pulse until rice consistency.
In a large pan, heat 1 Tbsp. oil and 2 cloves garlic. Add cauliflower and cook for 6-8 minutes, stirring frequently.
Meanwhile in another pan, heat 1 Tbsp. oil and 2 cloves garlic. Add onion and carrots. Saute for 4-5 minutes. Add chicken. Cook for 5-7 minutes. Add spinach, peas and zucchini. Saute until chicken is cooked through.
In cauliflower pan, make a well. Crack eggs into middle and scramble. Once eggs are scrambled, add chicken and veggies and remaining ingredients. Stir and cook until heated through.
Serve immediately.
Husband Rating: 8 out of 10
Food for Thought: Any protein and really any combination of veggies could work in this recipe. This is the combination we liked best. But, you could use beef, pork, shrimp, or no meat at all. You could add broccoli, pea pods, etc. for veggies. The possibilities are endless.
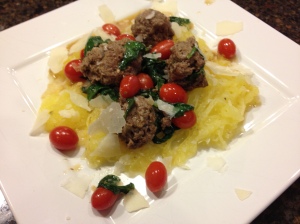
Spaghetti Squash with Meatballs
I love spaghetti squash! I wanted to have it for dinner but didn’t just want it as a side or a base for a red sauce. I found a recipe on www.wholeliving.com that I liked the look of and then adapted it to make it gluten-free and with a few different veggies. It was unique and delicious! My husband couldn’t believe the meatballs were just beef… and not some type of sausage. He thought they were the best tasting meatballs I have made yet. We will definitely want to hang onto this recipe!
Spaghetti Squash with Meatballs
1 spaghetti squash
salt/pepper
2 Tbsp. butter, melted and divided
1 onion, finely chopped
2 cloves garlic, minced
1 tsp. dried oregano
1/3 c. grated parmesan cheese
2 Tbsp. gluten-free breadcrumbs (see note)
1 lb. grass-free ground beef
2 Tbsp. grapeseed oil
1 c. beef broth
4-5 c. fresh spinach
1 pint cherry tomatoes
parmesan cheese for garnish/topping
*I had a loaf of gluten-free bread that bombed so I ground it up in the food processor and froze it to use a bread crumbs. If you don’t have bread crumbs, you can grind up gluten-free oatmeal, or use flaxseed meal or even ground up chia seeds.
Instructions:
Cut spaghetti squash in half and scoop out the seeds. Brush with 1 Tbsp. butter and sprinkle with salt/pepper. Bake in the oven on a baking sheet, face down, at 375 for about 45 minutes or until tender. Once cooked, scoop out of shell with a fork and set aside.
In a skillet, heat remaining Tbsp. butter. Add onion and garlic and sauté until tender. Remove from heat to a small bowl to cool. Once cooled, add oregano, parmesan cheese, bread crumbs, and ground beef. Combine with your hands and mold into meatballs. Mine were between 1-2 inches.
Heat oil in a skillet. Add meatballs and cook until browned on the outside. Remove from pan. Add additional oil if needed and cherry tomatoes. Be sure to scrape up any bits stuck to the bottom of the pan. Saute for 2-3 minutes. Add broth, spinach, and meatballs back into the pan. Cook until spinach is fully wilted and meatballs are cooked through.
Place a scoop of spaghetti squash onto each plate. Top with meatball/veggie combo and garnish with parmesan cheese. Enjoy!
Husband Rating: 7 out of 10

